


this is the best mango sticky rice cookies recipe you'll ever made
these not-too-sweet cookies are vegan and gluten-free and so, so good


ANNOUNCEMENT
My dear friend, my next cookbook, 108 Asian Cookies, is coming this October, and if you preorder now, you willl receive a year-long subscription to my premium Substack (worth $70) and access to new recipes all year long! Preorders mean so, so much to underrepresented authors like me and show publishers and retailers that voices like mine deserve prominent spaces on the bookshelves! Thank you!
END OF ANNOUNCEMENT
dear friend,
When I saw Nara Smith make a mango sticky rice cookie with butter, eggs (I think), and the usual Western cookie ingredients, I had to pause. Mango sticky rice is usually vegan and gluten-free. If I’m making a mango sticky rice cookie, I’m keeping it that way.
So I did. I made a mochi one.
Sticky rice is a primary ingredient in mochi. You pulverize raw sticky rice into powder to make sticky rice flour.
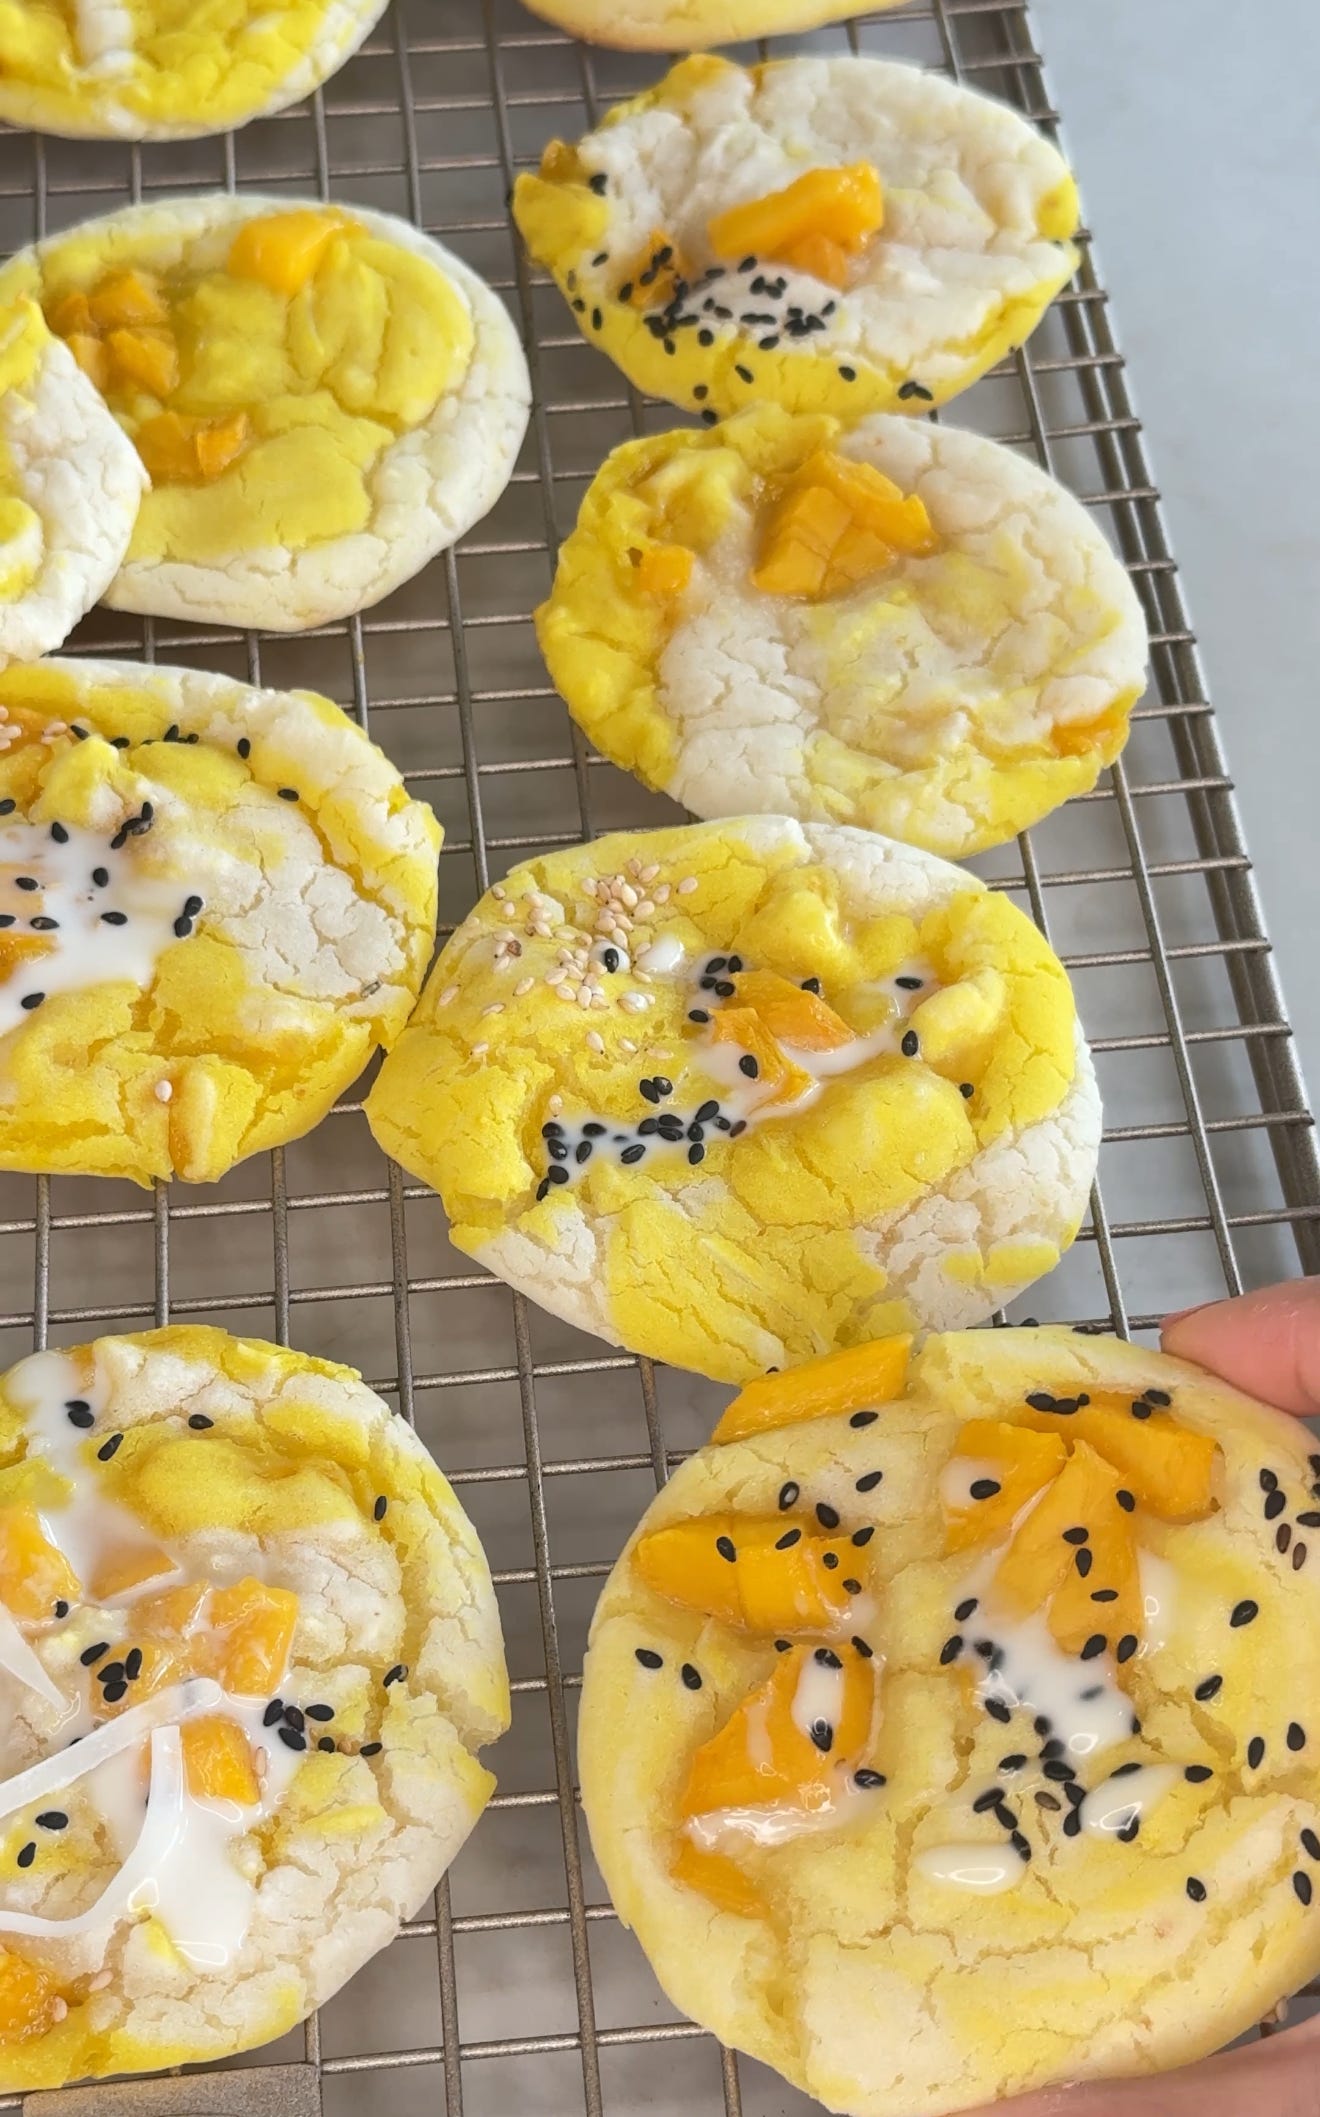
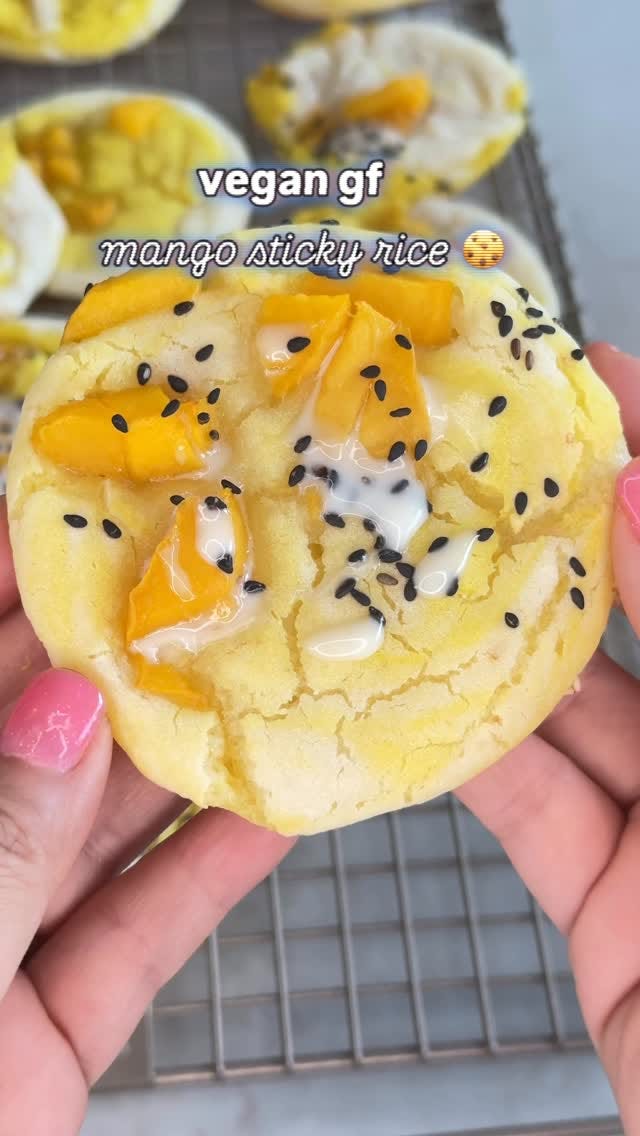
The cookies did not disappoint. They were crispy on the outside, chewy and tender on the inside, with syrupy warm mango in every bite. I drizzled my sweet coconut milk sauce over the top, sprinkled some toasted sesame seeds, and took a bite with my eyes closed.
It felt like eating mango sticky rice. Mmm. Or at least a version of it, in cookie form.
If you’ve already made my viral lemon blueberry mochi cookies or my matcha latte mochi cookies, you probably won’t run into any issues making these cookies.
Still, here are some keys for success:
Don’t overmix the batter. You want it to be a mashed potato consistency. Once the batter is well-combined and reaches that consistency, stop mixing it. Let it rest for a few minutes on the counter.
Use mochiko or glutinous rice flour. I'm sorry, but if you use regular rice flour, you’ll have a very runny batter and a very flat cookie. Glutinous means sticky or glue-like by the way, not of gluten. These cookies are 100% gluten-free. Also, I have had success 100% of the time using KODA FARM’s Mochiko. Someone used the green bag of glutinous rice flour you find in Asian supermarkets, and the batter ended up too runny. So for a higher chance of success with these cookies, use KODA FARM’s mochiko.
If the cookies are too sticky, grease your parchment paper. Also, you want the mangos to be on the top, so they don’t stick to the parchment paper, as they would if they’re on the bottom.
To avoid the cookies sticking to the wire rack, brush oil over the wire rack.
If the batter is too runny, add more glutinous rice flour, about one tablespoon at a time.
A little sea salt on top will taste lovely!!
Swirl the tops of the cookie batter with your spoon, as that will give the cookie a nice round shape and mimic the look of a regular cookie.
Kat Lieu’s One-Bowl Vegan and Gluten-Free Mango Sticky Rice Mochi Cookies Recipes
Makes about 12 to 16 large cookies
Prep Time: 10 minutes
Cook Time: About 14 minutes
Reel for reference:
Ingredients
For the cookies:
2 1/3 cups (about 350g) glutinous rice flour (like KODA FARM’s Mochiko)
2 cups (480ml) cold water
1 tablespoon neutral oil or olive oil (the oil keeps the cookies from sticking to the parchment paper)
1 teaspoon baking powder
1/3 to 1/2 cup (67g to 100g) granulated sugar, to taste (Sugar is the key to the crispness, by the way! Add more if you like sweeter cookies)
About 1/2 cup diced mangos
Yellow food coloring gel, a few drops
Note that a tablespoon of red or white miso will add a pleasant flavor, so feel free to also mix that in, or a little salt.

Instructions
Gather your ingredients. Preheat oven to 425°F (220°C).
Line a baking sheet with parchment paper. (Never wax paper! Silicone mats work too.)
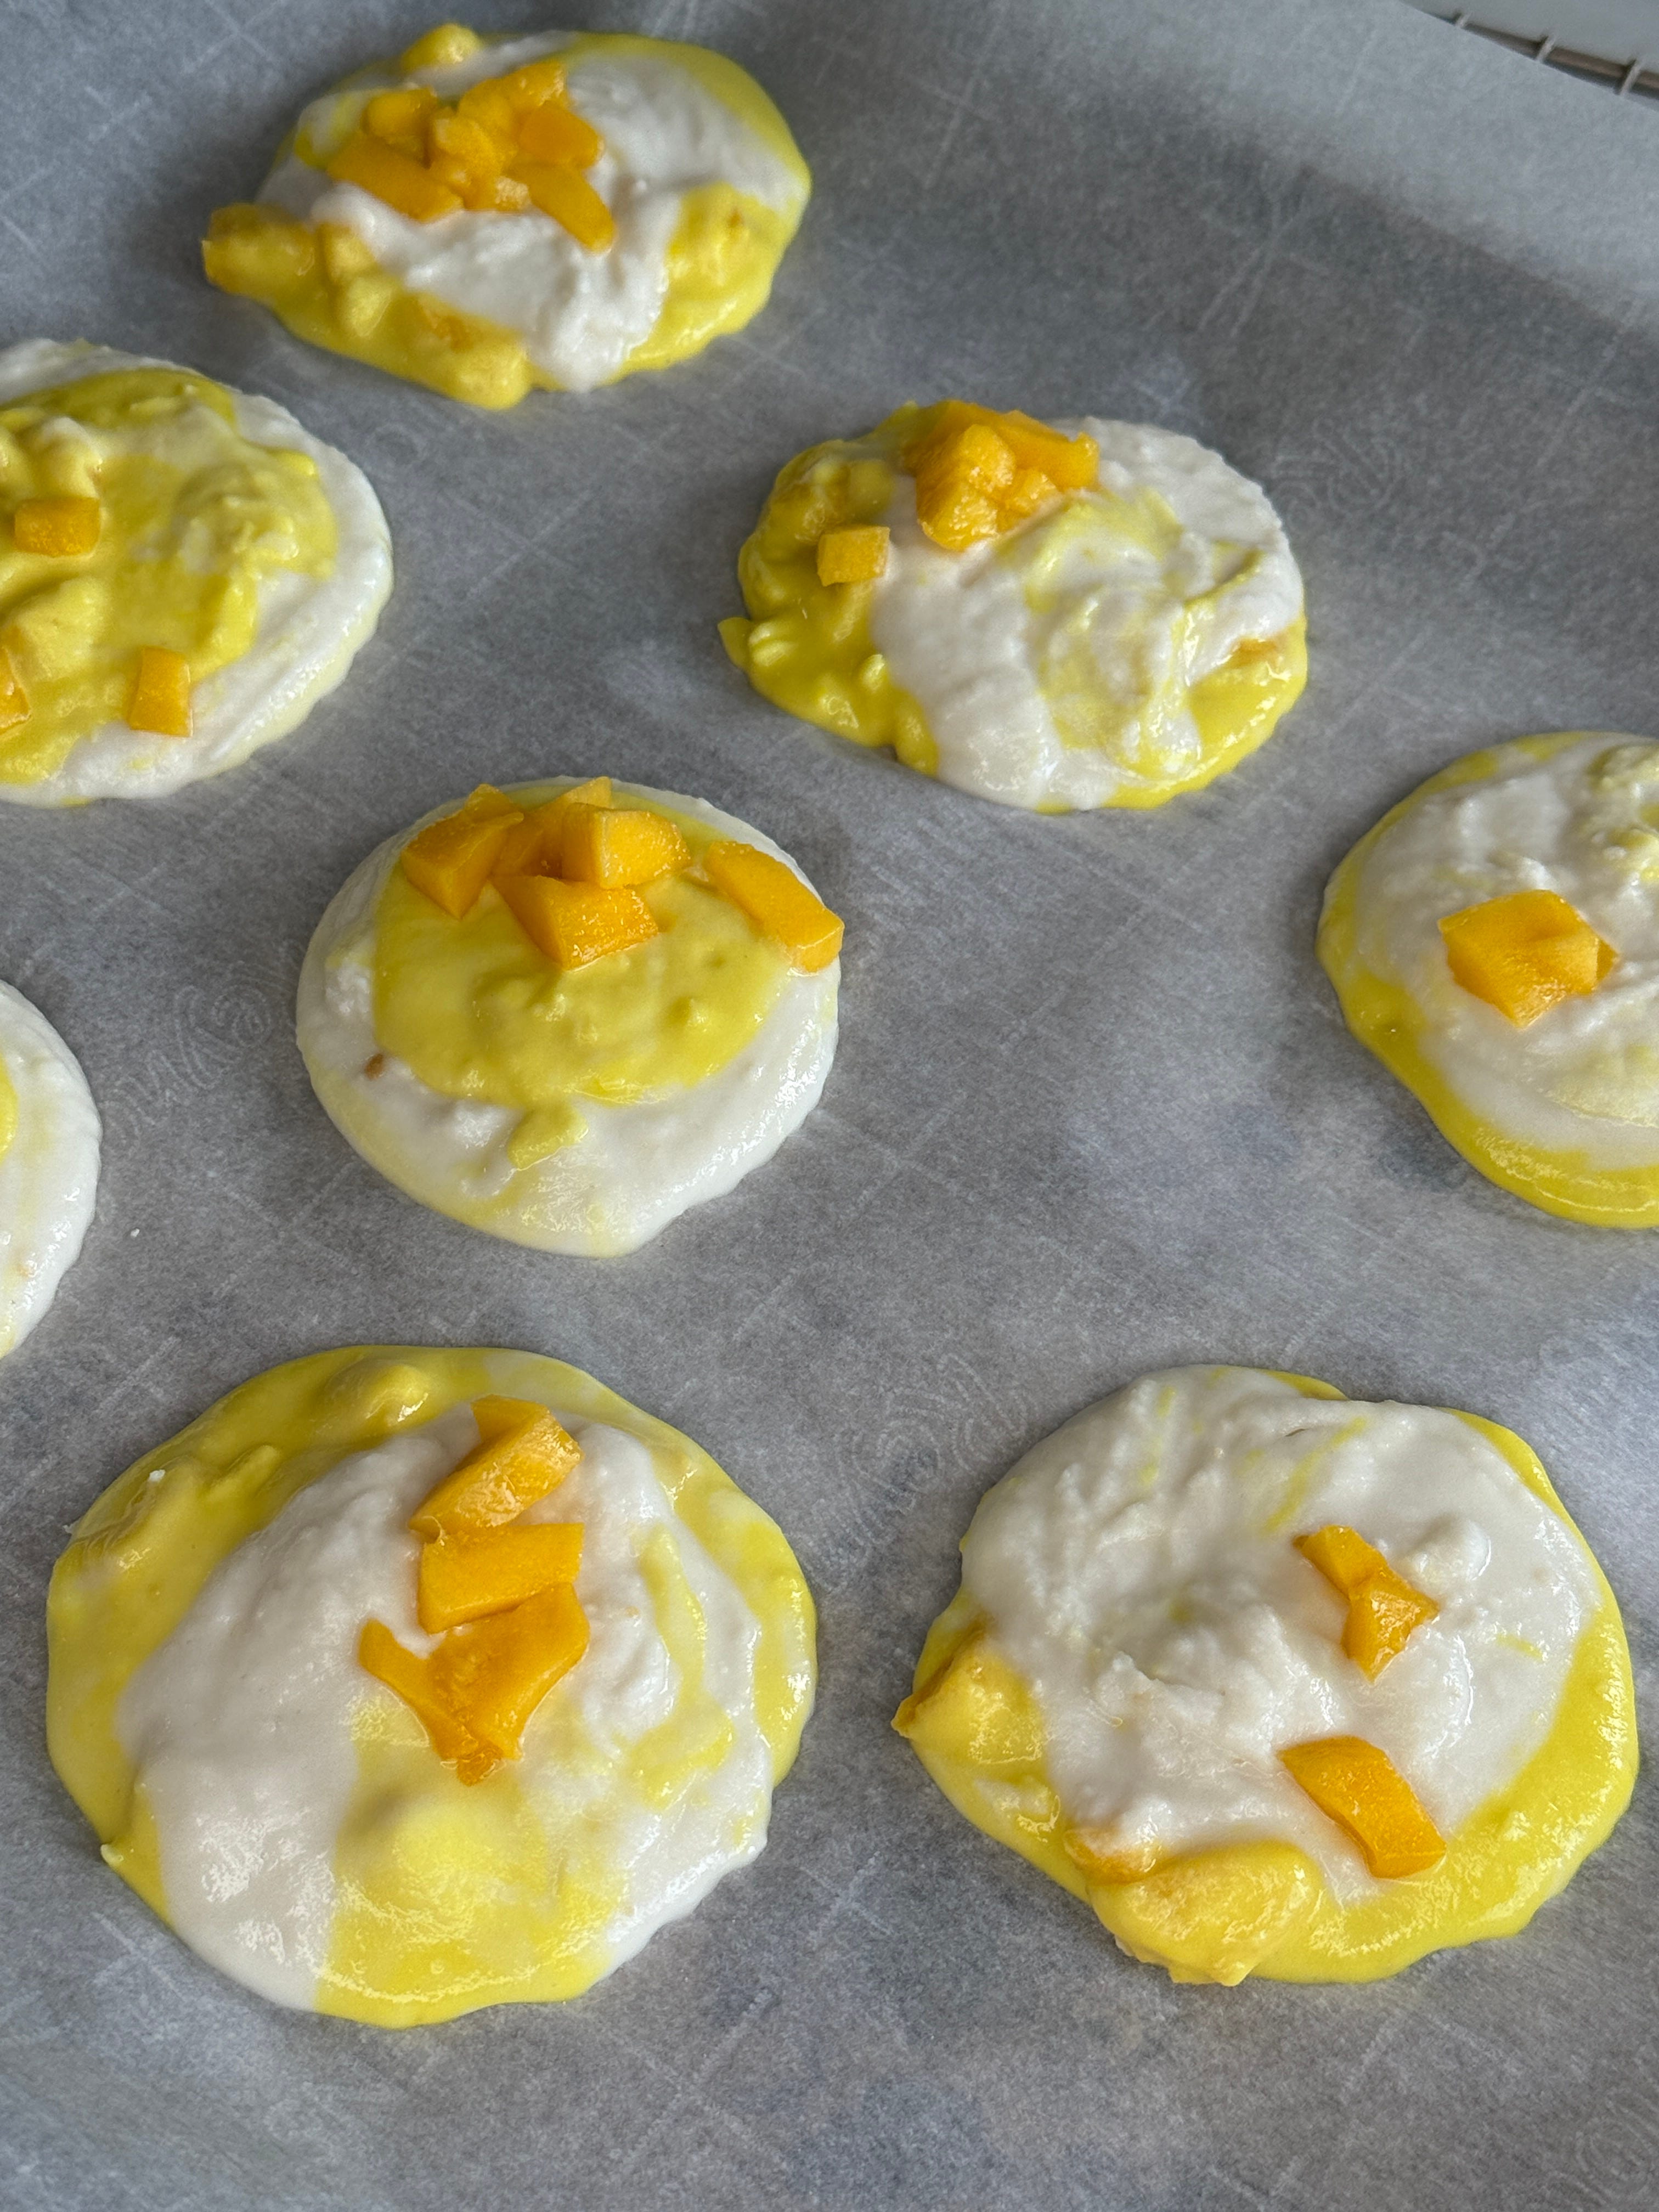
Combine the glutinous rice flour, water, oil, baking powder, sugar, and miso if using, in a large mixing bowl. Stir just until smooth, mashed potato consistency.
Divide the batter by placing a half of it in another mixing bowl. Mix in a few drops of yellow food coloring and the diced mangos.
Drop spoonfuls of batter onto your baking sheet. I like taking a little batter from the white batter bowl and then a little from the yellow batter bowl. Use damp fingers or a spoon to round them into cookie shapes. Leave about 1 inch (2.5cm) between each cookie—they don’t spread much. Each cookie should be about 2 inches in diameter.
Bake for 13 to 14 minutes, or until tops are firm and slightly crisp, edges golden, and bottoms browned.
Immediately transfer cookies to a wire rack to cool. If left on the baking sheet, they may steam up and soften. Make a quick, sweetened coconut milk sauce to drizzle over the cookies and top with toasted sesame seeds and coconut flakes. (Scroll all the way down for the sweetened coconut milk sauce recipe, for my premium subscribers only)
Storage: Keep cookies in an airtight container at room temperature for up to 2 days.
To refresh the crispiness, pop them in the toaster oven for a few minutes the next day.
Whether you’re baking these cookies to share with loved ones or just for yourself on a quiet night in, I hope they bring you as much joy, warmth, and comfort as they brought to my kitchen.
xoxoxo, Kat Lieu
“One day, I will be the Asian Julia Child…”- Kat Lieu <3 And you are paving the path for me to achieve this dream, dear friend <3

Keep reading with a 7-day free trial
Subscribe to Kathleen's Kitchen to keep reading this post and get 7 days of free access to the full post archives.